What are Ground Rods?
Ground rods are a crucial component of the earthing system. They are highly conducting metallic rods that are buried deep into the soil and play a significant role in protecting the electrical system from over-current and related damages. Ground rods are typically made of solid copper, copper-bonded steel, stainless steel, or galvanized steel. The type of ground rod chosen depends on factors such as soil type and resistivity, as well as the earthing design. Ground rods should have high conductivity and resistance to corrosion.
To check the quality of a ground rod, you can look for markings on the top end indicating that it is listed and approved by a recognized organization, such as Underwriters Laboratories (UL). The UL standard applicable to ground rods is UL 467, which is titled “Grounding and Bonding Equipment.” This standard covers the requirements for grounding and bonding equipment, including ground rods, used in electrical systems. It specifies the materials, design, construction, and performance requirements for ground rods and other grounding and bonding equipment.
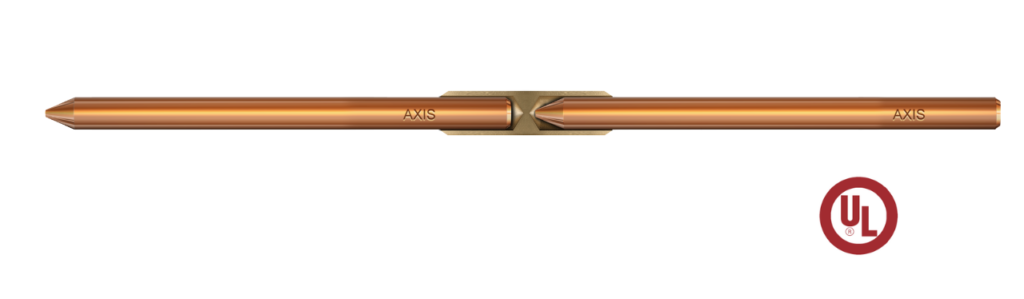
Copper-bonded ground rods are made by bonding a layer of copper onto the surface of a steel rod. The steel core provides the ground rod with mechanical strength and durability, while the copper coating or cladding increases its electrical conductivity and resistance to corrosion. The high mechanical strength of the core of the ground rods allows them to be easily driven into the soil using a hammer or other tool. This eliminates the need to dig a hole or trench, which can be time-consuming and labor-intensive.
Ground rods are also designed to be extendable using couplers to enable them to reach lower-resistance soil deep in the ground. This helps to improve the effectiveness of the earthing system by reducing the resistance of the ground connection. Extendable ground rods are also useful for earthing systems that require a longer ground rod, such as those in large buildings or complex electrical systems.
NFPA 780 for Ground Rod Installation
NFPA 780 is a standard published by the National Fire Protection Association (NFPA) is the “Standard for the Installation of Lightning Protection Systems.” Chapter 7 of NFPA 780 covers the requirements for ground rods and other grounding and bonding equipment used in lightning protection systems.

According to NFPA 780, ground rods must be installed in accordance with the manufacturer’s instructions and the requirements of the earthing design. The ground rod must be driven into the soil to a depth that is sufficient to reach lower-resistance soil, typically 8 feet or more. The ground rod must also be spaced a sufficient distance from the structure to avoid interference with the lightning protection system.
NFPA 780 also specifies that ground rods must be made of materials that are suitable for the intended application and the soil conditions. Copper- or copper-bonded steel ground rods are typically used in lightning protection systems because they have high conductivity and corrosion resistance. The ground rods must also be tested to ensure that they meet the required specifications and standards, such as UL 467.
ANSI/IEEE 80-2000, titled “IEEE Guide for Safety in AC Substation Grounding,” is another standard that provides guidelines for the installation of ground rods in electrical substations. It specifies the requirements for ground rod materials, installation depth, spacing, and testing to ensure that the ground rods are effective and safe.
Caution: Ensure that all individuals use proper tools, procedures and personal protective equipment for safety.
Materials Required:
A) Ground rod: This is the main component of the earthing system.
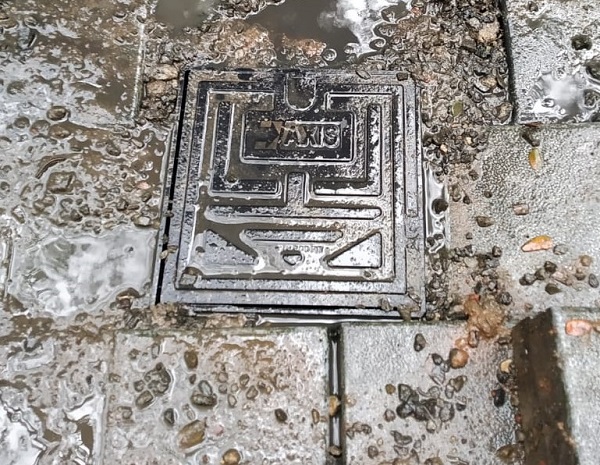
B) Earth pit or inspection chamber: This is a protective enclosure that can be fixed onto the ground rod to protect it from external factors or environmental conditions. An earth pit or inspection chamber also enables easy maintenance and inspections of the ground rod in the future.
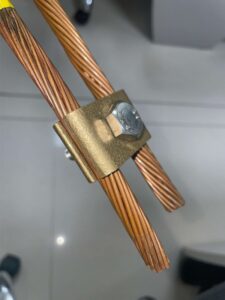
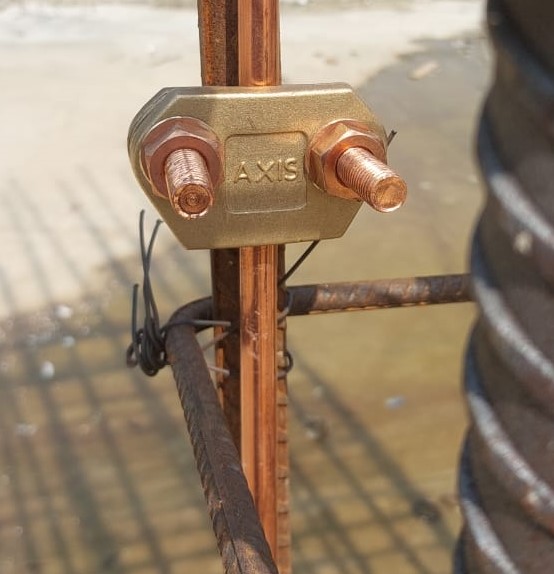
C) Ground rod clamp: This is a device used to secure the ground rod to the earth pit or inspection chamber. The ground rod clamp is typically made of copper or other conductive material to ensure that the ground rod is properly connected and has low resistance.
D) Earth-enhancing compound: This is a substance used to improve the ground resistance and conductivity of the soil. Earth-enhancing compounds are typically applied to the soil around the ground rod to reduce the resistance of the ground connection and improve the effectiveness of the earthing system.
E) Shovel or post-hole digger: These are tools used to excavate a hole in the ground for the ground rod. A shovel or post-hole digger can be used to dig a hole of the appropriate dimensions.
In addition to these items, you may need other equipment and materials, such as a driving rod hammer, and high-conductivity couplers for extending the ground rod. It is important to use the right equipment and materials to ensure the safety and effectiveness of the ground rod installation. If you have any questions or uncertainties, it is best to consult with experts or manufacturers who can provide guidance and support.
Installation Procedure for Installing a Ground Rod
1) Deciding a location: Start by choosing a location for the ground rod that is away from any underground utility lines. It is important to avoid damaging these lines during the installation process. The location for earthing installation must be identified considering these and other factors in the earthing design.

2) Soil Resistivity: Consider soil resistivity levels and soil treatment. Depending on resistivity and site conditions, the earth rod can be installed directly into the ground or earth enhancing compound can be used to improve ground resistance.
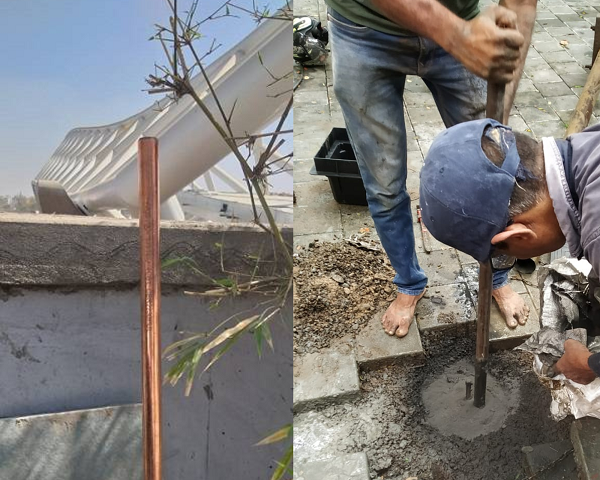
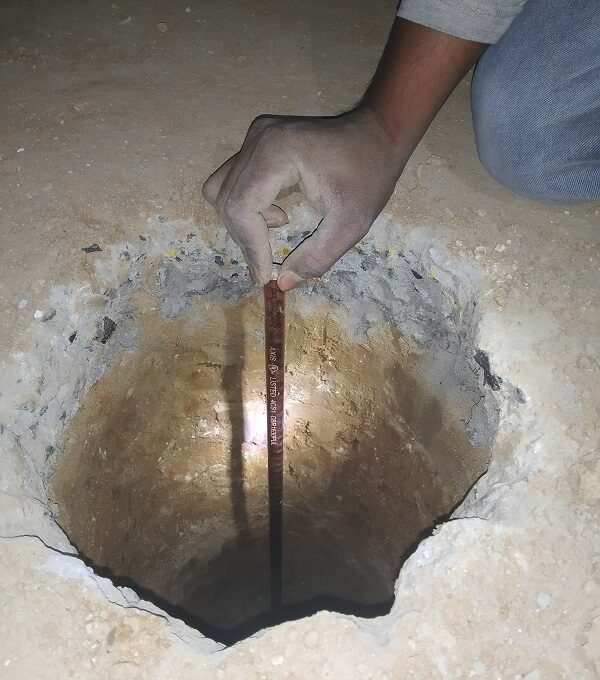
3) Excavate a hole of the required dimensions: Use a shovel or post-hole digger to dig a hole for the ground rod. The hole should be deep enough to allow the rod to be installed at least 8 feet into the ground. Usually, a hole of 120 to 150mm diameter and 2.4m depth is needed for driving the ground rod into the soil. This can vary depending on the dimension of the ground rod.
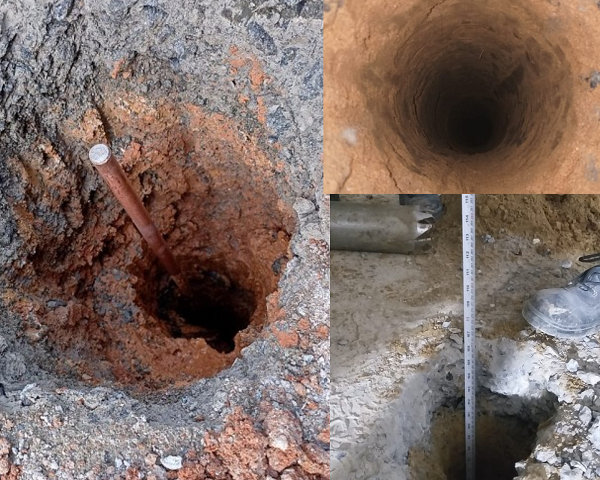
4) Ground Placement: Place the ground rod into the hole and use a hammer or sledgehammer to drive it into the ground. The rod should be driven in straight and level to ensure proper grounding. Ensure to remove all the packaging material from the rod. Make sure the pointed end is going into the soil. Once the ground rod is in place, attach a grounding wire to the top of the rod using a grounding clamp. The grounding wire should be long enough to reach the electrical panel or other grounding points.
Talk to our engineers!
6) Use of Grounding Clamp: Run the grounding wire to the electrical panel or other grounding point and attach it securely using the appropriate grounding clamp.
7) Use of Earth-enhancing Compound: The earth-enhancing compound must be made into a slurry (semi-liquid mixture) using water as defined by the manufacturer. Pour the slurry into the hole and completely fill it to the top. To ensure the slurry completely fills the hole keep agitating the rod while pouring the slurry.
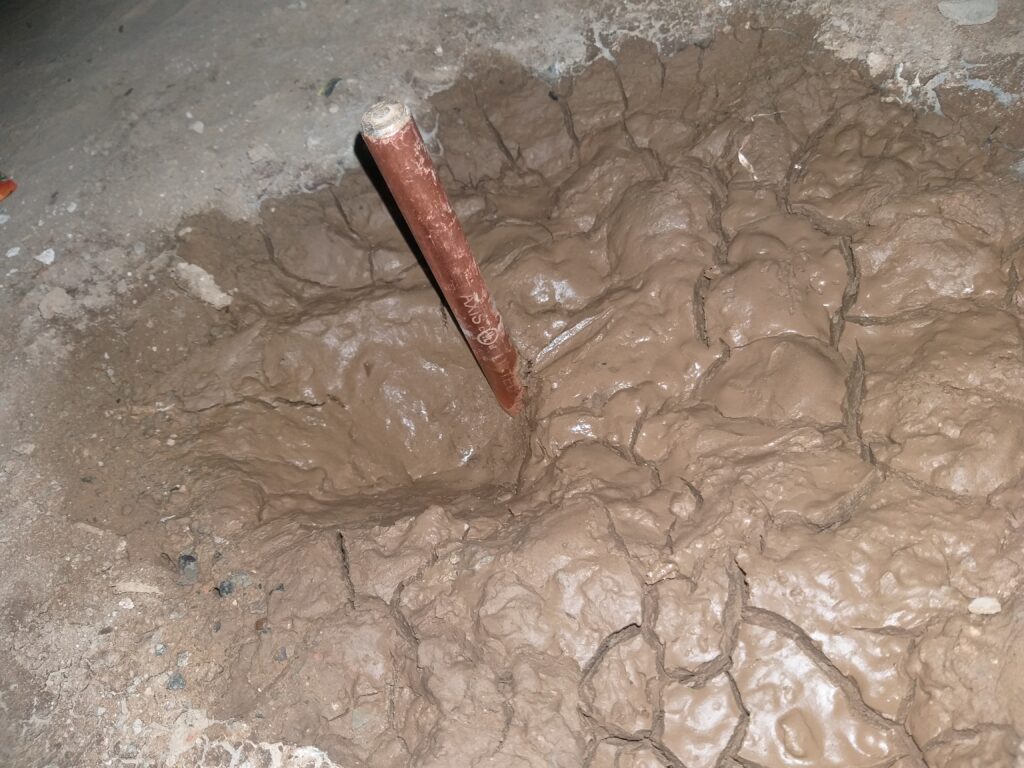
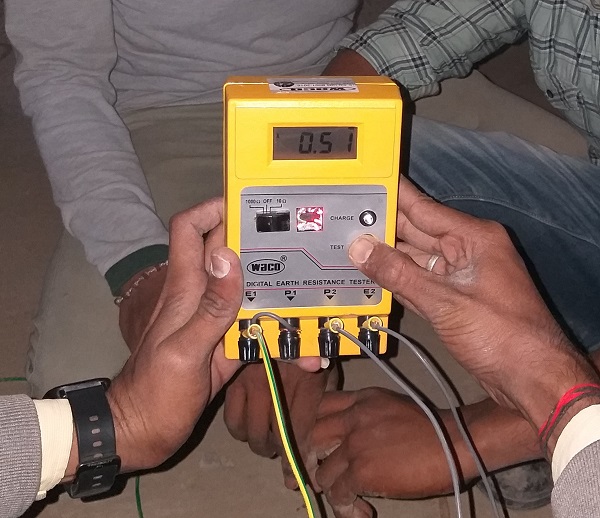
8) Backfill the hole: If there is any empty space in the hole or if no Ground Enhancing Compound is used the hole can be filled with the excavated soil. If a compound is used as a backfill, let the compound cure/set in the hole. The earth pit is now ready for use and can be used for earth connections after 1-2 days of installation after checking the resistance value.
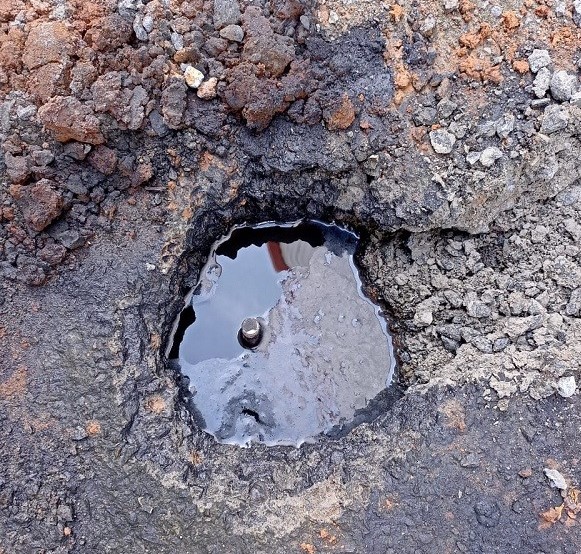
10) Installation of Ground Pit/ Inspection Chamber: Ground Pit can be fixed onto the ground rod to protect the rod from external factors or environmental conditions. It also enables easy maintenance and inspections in the future.
Watch our Ground Rod Installation video:
You now know the installation procedure for an Earth Rod. For an effective and safe earthing system, make sure to test the soil resistance and other parameters periodically. If you have any questions about Earth Rod Installations – feel free to connect with our experts!

Thank you for reading the blog, Axis is a leading manufacturer and supplier of Electrical Components to over 80+ Countries. Talk to our industry expert by visiting our contact us section. You can also watch our videos by our experts – click here.