Expert Electrical
Engineering Articles

How to install Satellite Connector for AB Cable?

Installation of Satellite Connector for AB Cable

Table of Contents

Can you make four tap connections using only one connector? The Satellite Connector, also known as Axis Multiport Insulation Piercing Connector can do that for you.

Read this blog to learn the step-by-step installation procedure for Satellite Connector on Low Voltage AB Cable. Learn how to create multiple tap connections using a single connector for power distribution and solar combiners.

  • Step 1 – Tap Cable Preparation
  • Step 2 – Stripping of Cable Insulation
  • Step 3 – Identifying Phases & Neutral Cables
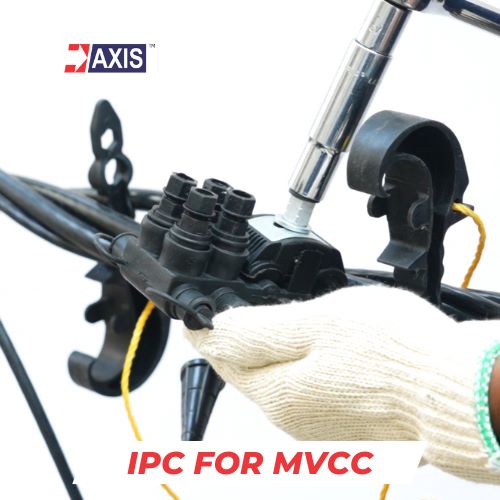
  • Step 4 – Installation of Satellite Connector
  • Step 5– Insertion of Insulated Cables into IPC
  • Step 6 – Making Tap Core Connection


Satellite Connector Installation

Note: Before starting, please ensure you use proper tools, procedures and personal protective equipment to avoid injury.


Step 1: Prepare the tap cable for installation. Measure the insulated part of the cable by comparing it with the IPC’s depth.

step 1: Satellite Connector Installation


Step 2: Strip the cable insulation at the end to create tap connections.

Step 2: Satellite Connector Installation  Step 2: Satellite Connector Installation


Step 3: Select the portion of the AB Cable where you will install the Satellite Connector. Identify the phase and neutral cables for tapping. Note that there is a separate connector for each.

Step 3: Satellite Connector Installation

Note: There is a special connector for Neutral & Phase

Talk to our engineers!


    Step 4: Install the Satellite Connector on the neutral cable and use the phase separator to create space for installation on the cable.

    Step 4: Satellite Connector Installation    Step 4: Satellite Connector Installation


    Step 5: Insert the insulated cables into the main side of the IPC then tighten the main aluminum shear-head nut with a suitable spanner until the shear head breaks. This completes the main core connection.

    Step 5: Satellite Connector Installation     Step 5: Satellite Connector Installation


    Step 6) Insert the stripped end into the free tap points and tighten the plastic shear-head nut on the tap side until it breaks. This completes the tap core connection for the neutral cable. Follow the same procedure for other tap connections

    Step 6: Satellite Connector Installation     Step 6: Satellite Connector Installation

    Note – You can follow the same procedure to install the IPC on the phase cable as well.

    I hope now you have a clear idea about the installation of a Satellite Connector. If you have any doubts, reach out to us. We have a team of 50+ engineers ready to help you design and install your AB Cable Accessories.

    Thank you for reading and if you found this informative, then feel free to contact us to get a quote or to know more about our products; visit our product section at https://axis-india.com/products/ 

    Related Post
    AB Cable Accessories

    Insulation Piercing Connector – Working Principle & Types

    AB Cable Accessories

    AB Cable – Installation & Laying Best Practices

    AB Cable Accessories

    How to Install Preformed Alignment Tie for Covered Conductor?

    Documents selected
    Loading...