Before we get into the actual installation, please note that you should complete the Lightning Protection & Earthing System design including:
1) Site Assessment
2) Risk Assessment
3) Soil Resistivity Measurements
Based on these calculations, you can decide the location of the Lightning Arrester, Earthing Installation and select the appropriate ESE Model.
You can use this chart to choose the Lightning Arrester best suited to your structure.

For example, if your structure’s height is 10 meters with a mast of 5 meters, your total height is 15 meters. If you are aiming for “Protection Level 4” for your structure, then your protection radius will be 111 meters for the ASLA 60 model. We installed the ASLA 60 Lightning Arrester in this video.
Talk to our engineers!
ESE Lightning Arrester Installation Procedure
The installation is done in 4 phases.
1) Assembling the ESE Lightning Arrester
2) Assembling and Installing the Mast
3) Installing the Down Conductor
4) Installing the Earth Termination
Free Book on ESE Lightning Arrester

Phase 1: Assembling the ESE Arrester
Step 1) Read the instruction manual carefully, which is enclosed in the Product Packaging.
Step 2) Fix the adapter to the ESE Lightning Arrester which is required for the mast.
Step 3) Fix the lower spike of ESE with the help of the Allen key, provided in the box.
Here’s a specific video dedicated to ESE Lightning Arrester assembling:
Phase 2: Assembling and Installing the Mast
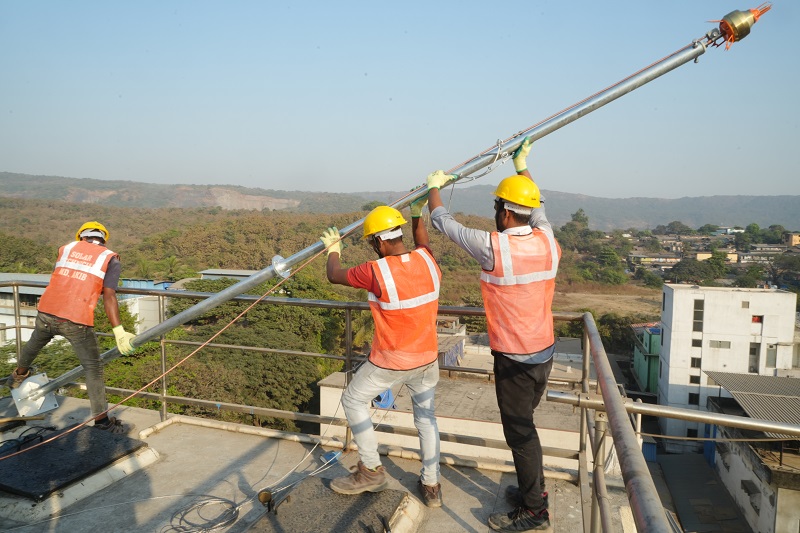
To install the mast for the shortlisted location, make the concrete foundation wherever required as per site condition. The mast can be installed on the structure with the help of a suitable bracket or into the structure directly with the help of anchor fastener bolts.
Note: A heightened mast comes with a suitable section which needs to be assembled at the site during installation.
Assemble the mast sections with the help of accessories provided for suitable height as per Lightning Protection System Design.
Now fix the assembled ESE lightning arrester to the mast and connect the conductor to the ESE arrester with the help of the connection clamp provided along with the ESE arrester.
Install the mast at an identified location, for that you need to drill holes to install Anchor Fasteners. After that, fix the base of the mast on the foundation with the help of an anchor fastener.
To protect the mast from the heavy wind flow use the guy wire. Fix the guy wire on the mast and the supporting structure or foundation if required.
Phase 3: Down Conductor Installation
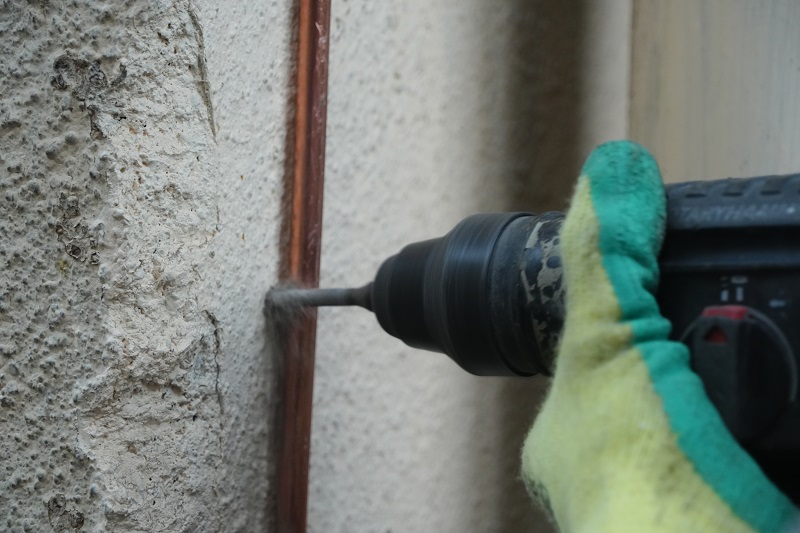
The conductor which is connected to the ESE should then be taken downwards.
Use the conductor holder clamp to fix the down conductor onto the wall.
Maintain a distance of 0.5 to 1 meter to fix the down conductor.
Install the Lightning Event Counter to count the number of lightning strikes, it will be installed on the down conductor. We have a separate video dedicated to the installation of the Event Counter. Link in the description.
Now, install the Test Clamp at the bottom, ensuring the height is approximately 0.5 meters. It helps in maintenance.
It is recommended to use an insulated conductor or insulated sleeve on the conductor at the bottom, at a height of 2 meters for safety purposes.

Phase 4: Earth Termination
Step 1) Identify the right location based on the Earthing Design. You can use the Axis Earthing Design Software to help you calculate the best areas for your Earth Rods.
Step 2) Dig a hole with a depth of 3 meters (or equivalent to the length of your Earth Rod) and diameter 120 to 150mm.
Step 3) Place the earth rod at the centre of the hole. Make sure to remove all packaging material from the rod before placing it into the hole. Ensure that the pointed side of the rod is going into the ground.
Step 4) Use a coupler to extend the rod as per the required length.
Step 5) To improve the soil resistivity, use earth enhancing compound as the backfill. For this, premix the earth-enhancing compound into a semi-liquid mixture using the required amount of water.
Step 6) Pour the mixture into the hole and completely fill it to the top. To ensure that the mixture completely fills the hole, keep agitating the rod while pouring it.
Step 7) Place the earth pit on the earth rod, to protect the rod from external factors or environmental conditions and for easy inspection and maintenance.
Step 8) Connect the conductor to earth rod with the help of ground clamp for proper earthing connection. Use the Clamps to connect the Earth Rod to conductors.
Note: Check the resistance value of the entire system to ensure you have met project specifications.
Here’s a video explaining the installation on-site:
ESE Lightning Arrester installation is now complete. Please make sure to test the soil resistance and other parameters periodically. As a trusted lightning arrester manufacturer, Axis has a team of 40+ engineers who are here to help you in designing, installing, and testing your earthing systems. Our products have been used in substations, data centres, factories, and even in everyday residential and commercial buildings.
For more information, please contact us at axis-india.com/contact-us/
Thank you for reading the blog, Axis is a leading manufacturer and supplier of AB Cable Accessories and other Electrical Components to over 80+ Countries. To get a quote or to talk to our industry expert visit our contact us section. You can also watch our videos by our experts – click here.
Follow us on LinkedIn for regular updates on our Products!