
In this blog, we will go through a common installation checklist for two key components in any medium voltage cable system – Heat Shrinkable Straight Through Joint and Termination Kits.
What are Straight Through Joints & Termination Kits?
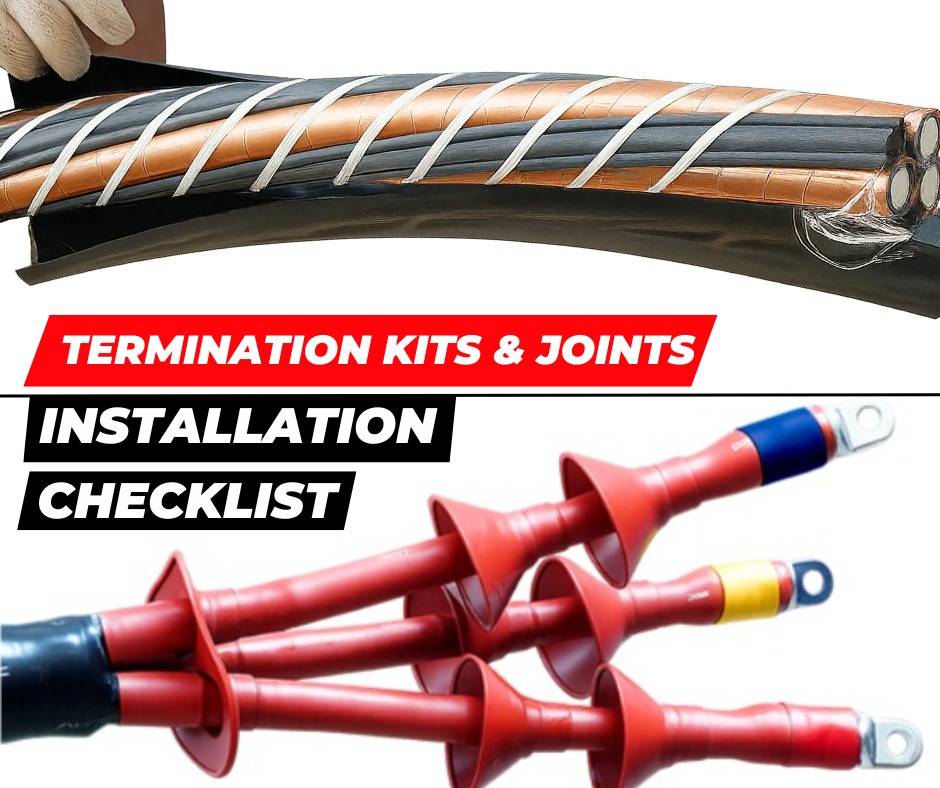
A Straight Through Joint connects two ends of a cable, restoring electrical and mechanical continuity.

Termination Kits connects the cable to equipment such as transformers or switchgear, providing insulation, stress control, and sealing at the cable end.
The Checklist
1. Check for the testing certificate

Before you procure a termination kit or straight through joint, ensure it is type-tested as per, IEC 60502-4, IEEE 48, CENELEC HD 629.1 or IS 13573-2. Ask your supplier for the test certificates. The standard ensures that the kit meets electrical, mechanical, and thermal performance requirements for medium voltage systems.
2. Select the correct kit for the cable size

Before installation, make sure the kit matches your cable size and type, that is armoured or unarmoured. Each kit is designed for a specific size range, and even a small mismatch can cause improper shrink fit or poor sealing. If the kit is too loose, moisture will enter and cause insulation failure. If it is too tight, the components will tear or crack during shrinking.
3. De-energise the system before jointing
Make sure your system is completely de-energised and properly grounded. This is a safety requirement that protects both the installer and the equipment. Working on a live or partially charged system can cause electric shock, cable damage, or short circuits.
4. Follow the instruction manual carefully

Before cutting or stripping any layer of the cable, always refer to the manufacturer’s instruction manual. Each kit has specific dimensions for sheath removal, insulation stripping, and tube positioning. Misfit components cause stress concentration, loose fitting allows moisture to enter, and improper preparation will create partial discharge spots.
Talk to our engineers!
5. Remove the Semi-Conductive Layer Carefully

While removing it, take extreme care not to damage the primary insulation beneath it. Even small nicks, cuts, or scratches create stress points that cause partial discharge and cable failure.
6. Do Not Forget to Clean the Insulation

Before sliding heat shrink tubes on, thoroughly clean the insulation using the manufacturer-provided solvent, to remove dirt, grease, or semi-conductive particles. Abrade the surface with the supplied abrasive paper, then clean it again to ensure a smooth, contamination-free surface.
7. Smooth Out Sharp Edges and Fill Gaps
File down any sharp points, burrs, or rough edges on connectors, crimps, or cut cable layers like the semiconductive screen or armour clamps. Sharp edges can tear the heat shrink components or cause stress during operation.

Use the supplied mastic to fill all gaps and uneven areas, especially between the lug barrel and cable insulation, and at the crutch area where the cores separate. This makes the surface smooth, removes air pockets, and helps the heat shrink components fit tightly.
8. Use LPG Torch for Shrinking

LPG is preferred because it is portable, provides high heat output, works faster, and is more economical compared to butane torches, kerosene blowers, or heat guns. Adjust the torch to obtain a soft blue flame with a yellow tip, and avoid a sharp pencil-like blue flame. After shrinking, all components should be smooth and wrinkle-free, showing that the adhesive has flowed evenly and the component has sealed properly.
9. Keep the Flame Moving

Many jointers make the mistake of holding the flame in one place while shrinking. This scorches the component and creates weak spots. Always keep the flame moving in a steady, circular motion to heat the component evenly. Start shrinking the components at the position mentioned in the manual and continue along the length uniformly. Proper shrinking makes the component fit tightly to the core without any air pockets, ensuring a strong seal and long service life.
10. Use a Proper Crimping Tool
During installation, always use the recommended crimping tool and die size for your lugs. Using pliers or an incorrect die will result in loose or over-compressed connections. Loose crimps increase resistance and cause heating at the joint, while over-crimping damages the conductor strands.
We hope you now have a clear understanding of what to check while installing heat shrinkable Heat Shrinkable Straight Through Joint and Termination Kit. Always ensure that the selection and installation of heat shrink components are carried out by trained and authorized professionals.
At Axis, we have a team of over 50 engineers who can help you with choosing, applying, and testing heat shrink solutions. Our products are installed worldwide in solar farms, substations, data centres, factories, and in everyday residential and commercial projects.